Search Prior Creations

Friday, August 19, 2011

Nursery Chandelier

  How to Decorate your Nursery on a Budget

     Ever look through home magazines and see beautiful chandeliers in a beautiful nursery or living room then look on-line to buy the identical item?  More than likely the price for those chandeliers purchased at a store range for over $100.  DON'T DO IT! You can get the same chandelier for way cheaper.

Here's how:

Look on Craigslist for cheap chandeliers or your local thrift store.
                                Here's one I just found on Craigslist in my area for $25:
Here's what you can turn it into with paint, small shades, beads, and time:

Think about the money you could save by doing this project yourself.  Depending on the deal for the chandelier itself, the paint, beads, and lamp shades can all be purchased for less than $40 off Amazon.  That potentially saves you about $100 and it's personalized to your decor!

This chandelier sells for $199 at Pottery Barn Kids...
Alyssa Crystal Chandelier
This can be done for under $60 depending on the cost for the chandelier.

So whenever your out check out your local thrift store, flea market or garage sell.  At home browse Craigslist.  You never know when you'll find that gem that you can recorate into a beautiful item.

Tuesday, August 16, 2011

Quilt Mat


How to Make a Quilt


  I tried quilting for the first time.  Its not that hard to do if you have hours to do it.  You can go to any place that sales fabric and get a pack of fabric squares.  I got these squares off Amazon under quilting squares the price ranges from $8-$12 for a pack of squares.

Amy Butler SOUL BLOSSOMS PASSION 5" Quilting Fabric Squares

1.) You start by sewing a line of squares together-you sew the same way as other fabric-place the squares face to face so the design part is facing each other and sew the pieces together-(I did a role of 6) then sew those roles together. 

2.) Once their sown together it's like any other piece of fabric. You can make the entire mat quilted on both sides or use another piece of whole fabric to sew the quilt piece onto. 

I was thinking of making a baby bag as my next project if I get more time.  It's time consuming to sew all the squares together but the results are definitely worth it.  I used PUL as the other fabric so it could be water resistant for my daughter's bottles (and spit-up).

Monday, August 15, 2011

Cloth Diapers and Covers

 Fabric, Snaps, and Velcro Oh My!

 I am entering the world of sewing with a bang and a splat-literally.  Disposable diapers are a mess as is but that doesn't stop me from trying to save a buck or two by sewing my own diapers.  Sewing itself is relatively easy minus the curves that end up looking like arrows from the sharp turns.  I made a diaper cover as my first inventive project.  The reason why it was a diaper cover and not a fullblown diaper is because I didn't put in elastic bands, which is a huge no-no in diapering.  I heard PUL is great material for the inside of the diaper because it allows water/substance to not leak through however it is a bit expensive.  I decided to change fabric and try other avenues.  I tried using an insert of terry cloth with PUL inside the terry cloth to go in the diaper sleeve so that it's not so rigid or bulky but I ended up with a big baby and small diaper. She had outgrown the small diaper pattern I had.  The diaper came out great but I couldn't test it out.  I recently finished a terry cloth diaper with PUL sown in the middle for extra coverage.  I am waiting on the velcro strips to come in to try it on my daughter, Kennedy. 

I chose velcro fasteners this time because it allows me to really it fit it to Kennedy and not just snap as close as a fit as I could.  The new velcro isn't like the old velcro strips that tear up in the wash.  The new velcro has only hooks verses the hook and loop (where the loops would get torn out and furry after awhile).  This velcro is now being used to hold pictures up on the wall without having bang a nail in, so it should be good to hold a diaper on 15 lb baby right?!  I guess we will see! 

I love seeing how others do their diapering.  There's no right way to make a diaper, to each their own.  You never know when your diaper might be the "revolution" to cloth diapering everywhere! :)

This is the diaper cover with PUL fabric inside and snaps

The pattern for cloth diapers can be found at any fabric shop.  I got a pattern at Joanns Fabric to begin with and after a few tries I eventually just started to wing it to find a diaper that is more appropriate for Kennedy.

This is the cloth diaper I made with terry cloth inside and an insert of PUL inside with clear Velcro fasteners.

The fasteners are virtually unexposed and since they are clear they don't ruin the look of the diaper.


If you look in the middle you can see how the sew the PUL insert in between the terry cloth and fabric. The diaper was able to contain everything but she did manage to leak through so I suggest an added insert of PUL.

My Little Red Chair

  I got together with an old friend over the weekend.  In the old days we would get together on weekends all dolled up to do the Pub run.  Its funny how we both hit a milestone in our lives, motherhood.  We went to the local flea market in search of anything old and corrupted so we could refurburish and transform our house into a Martha Stewart recreation.  We found a lot of neat things like an old Nikon camera she wanted to purchase but couldn't get the lens to open right.  Old photography is another upcoming obsession we are entering.  I came across a little blue chair that looked like it had been sitting in the back of a garage for quite sometime.  Honestly I could of talked the lady down to $5 since the chair barely looked like $2 was a good price but I decided to give that extra buck up and pay $6 for the cute little chair.  I already knew what I wanted to do with it.  I wanted to sand down the rough parts so little Kennedy wouldn't get raging splinters from the wooden seat and paint it what I was thinking in a light blue (my favorite color!) But my husband was thinking cherry red and was he right about the color!  It pops and looks so cute and vibrant! It's like I resurrected an old memory, an old thought that nobody gave attention to until a little TLC brought it back to mind.


I use Dual Paint and Premier Spray Paint since the chair is so small and only 2 cans were needed to completely cover it.


Voila! Easy to do.


All you need for small projects like this are:
-Spray paint
-Sandpaper
-Place to do it so you don't get it on the concrete...opps!

How to Make a Memory Board?

Memory Boards


Personalized Memory Boards made Cheap
I hit a new stage in my life, the creative I-Can-Do-This-Myself stage. Why buy when I can create and personalize it to my own needs? Maybe my time spent in front of a sewing machine or thrift store are bound to change as I reenter the workforce again but weekend projects are still easy and fun to fulfill. Memory boards are a good day project and relatively easy to do. What's great about doing it yourself is the opportunity to pick your own fabric, design and features.

Take for instance the memory board I created for my daughter. Memory boards don't have to be limited to one board, I did a collaboration of 6 small boards covered in batting and fitted with fabric of my chose. I left 2 boards plain because the designs itself was overpowering enough. I made one board a hair clip board by sewing in 3 strains of ribbon and tacky gluing cute buttons to the end to keep the ribbon taunt. On another board I sew a pocket in that can be used for small books or loose papers. The other boards had ribbon differently arranged with clips to hold pictures. 2 clips had matching elephant fabric tacky glued on to tie in the boards.

What you need:

-Plywood boards (even strong cardboard could be a substitute!)
-Fabric
-Batting
-Scissors
-Accessories (buttons, clips, anything you want to incorportate onto your board)
-Tacky glue or staple gun


1.)  Find a piece or pieces of plywood board that you would like to work from.  I used Baltic Birch Plywood 1/8" x 12" x 12" that I purchased off Amazon but you can also try your local hardware store.  The surface is very smooth and looks cleaner than regular plywood.


2.) Cut out fabric and batting to the shape of the plywood squares and tacky glued on, although stapling could be done was well but I'm not sure how it holds up on plywood.  Once you have everything glued or stampled down then you can look at your boards and decide what features you want them to have.  I love putting up pictures so I made 2 squares dedicated to clipping pictures up.  We also had some hair clips floating around my daughter got as baby shower gifts but she's been blessed with being bald I didn't want to lose them so I made hair clip ribbons.  The only sewing needed is if you wanted to sew on a pocket or little added features but most can be done with just a glue/staples.


Here's a finished product customized to fit my/daughters needs:


For hanging purposes I glued a ribbon across the back to hang up from the nail.


Framed Memory Boards
Other Beautiful Examples of Memory Boards for a room
(and cheap!)...


Done the same way but put into a frame (with the glass removed)...perfect way to find new use to an old frame sitting around the garage.  You can get the frame the color you want by purchasing cheap paint or spray paint.

Here's one of my framed memory boards:
NO GLUE OR STAPLES NEEDED!

Its used in the kitchen for small notes.

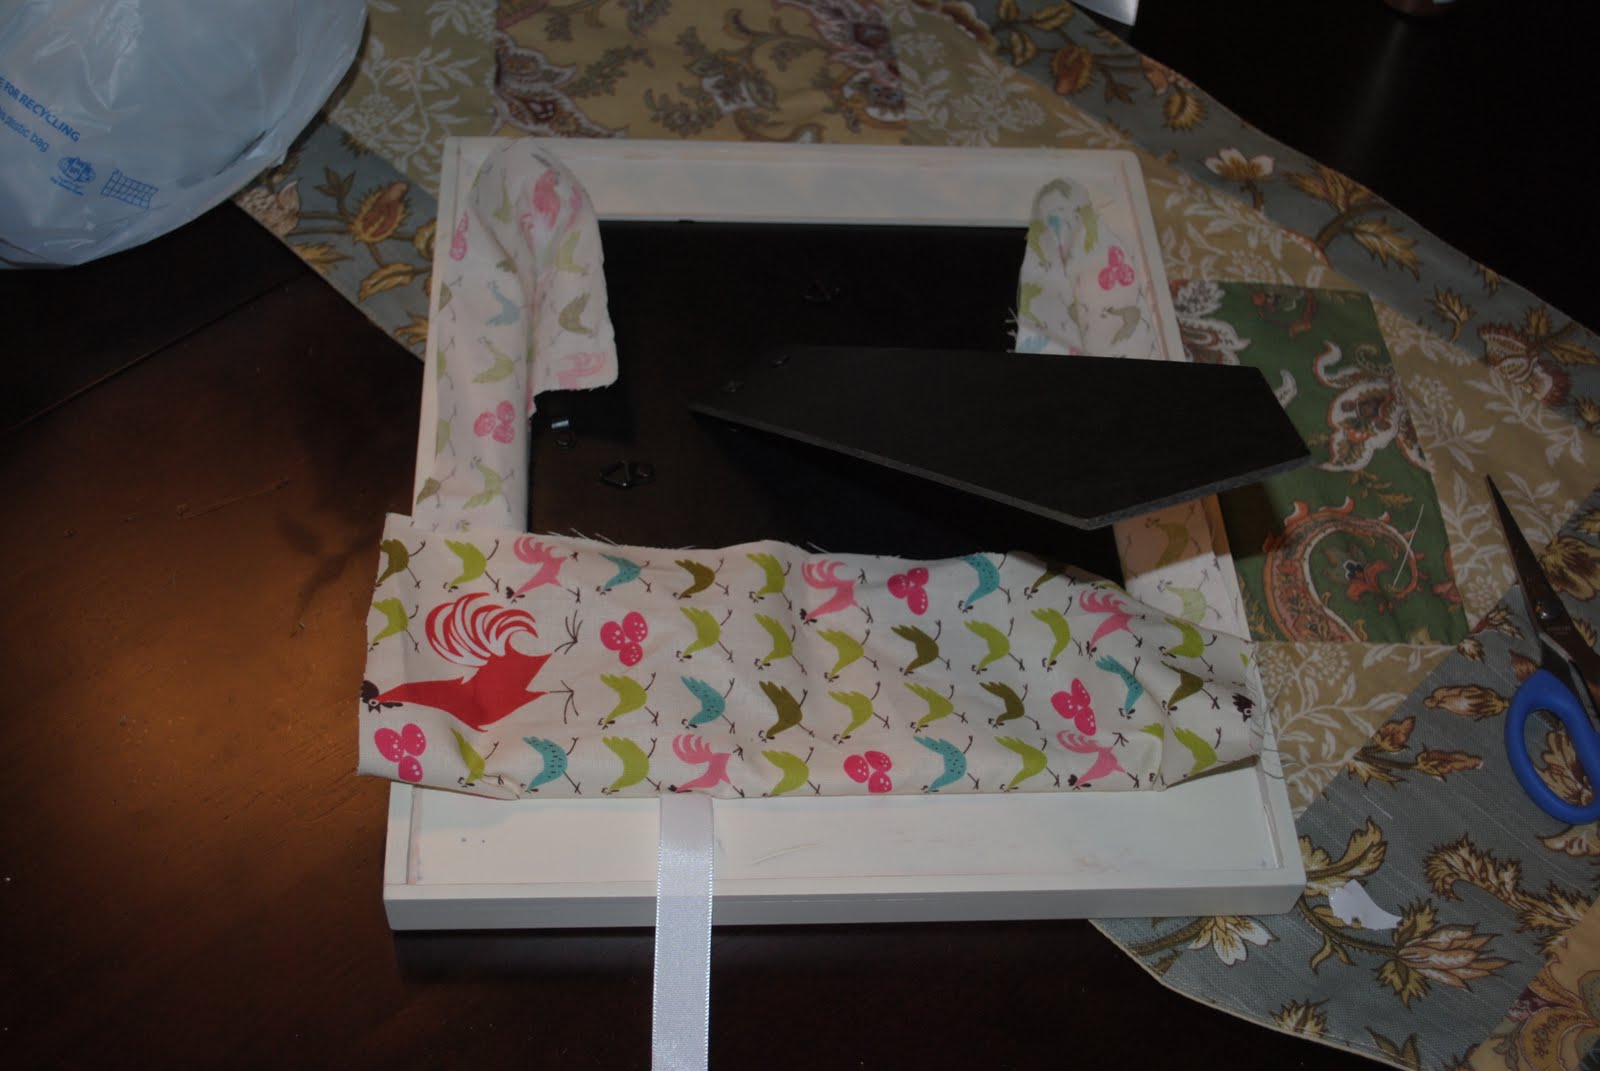
This is what it use to be. I loved the frame I got it for fairly cheap off Amazon but the glass broke during a move.

I took the glass out and measured the batting out. 

I put fabric over the batting and put the back on.  I pulled the extra fabric hanging off the back to make the fabric tight and not look so wrinkly.  Once I got the fabric and ribbon as I tight as I could get it I pushed the rest of the back in and cut the fabric off the back.


Check out my other posts on how to create and design on a budget